Collisions Ionic Bonding Game: Teaching Strategies to Use in Your Classroom

Collisions Ionic Bonding Game: Teaching Strategies to Use in Your Classroom

Have you been using the Collisions: Ionic Bonding Game with your students? Below are some additional strategies to help with planning your lessons.

  • Before starting the game, ensure that students know the meaning of the following terms: positive charge, negative charge, cation, anion, net charge or total charge, ratio, neutrality.
    • As students play, introduce the terms polyatomic ion and lattice structure.
  • Illustrate how to calculate the total cation charge, total anion charge, and explain how to ensure that those add up to zero in the end.
  • Draw students’ attention to the “criss-cross method” that is often described on
  • YouTube (also sometimes referred to as “swap and drop”), and point out the pitfalls of using it for compounds such as MgO, TiO₂ or Al₂(SO₄)₃.
  • Explain electron transfer. Post these short Ionic Bonding videos for your students to watch!

  • Challenge your students to master the Ionic Bonding Sandbox Achievements:
    • Ionic compounds containing specific atoms
    • Ionic compounds containing ions of specified charges
    • Ionic compounds containing specific ions
    • Ionic compounds from a given chemical formula
    • Or, make up your own challenges and have students submit a screenshot of their work!
  • Have your students identify ionization energy trends, and draw the trends as big arrows across each period and down each group on a blank periodic table.
  • The Ionic Bonding game shares Connected Levels with the Ions game and the Acids & Bases game. Have your students complete both the Ions game and one of the other two games, to open up the pipe between these games and CONNECT their learning!
Collisions Intermolecular Forces Game: Teaching Strategies to Use in Your Classroom

Collisions Intermolecular Forces Game: Teaching Strategies to Use in Your Classroom

Have you been using the Collisions: Intermolecular Forces Game with your students? Below are some additional strategies to help with planning your lessons.

  • Before starting the game, ensure that students know the meaning of the following terms: partial charge, dipole, temporary dipole, permanent dipole, polar bond, nonpolar bond
    • As students play, introduce the terms London dispersion forces, dipole-dipole forces, hydrogen bonds, polar molecule, nonpolar molecule
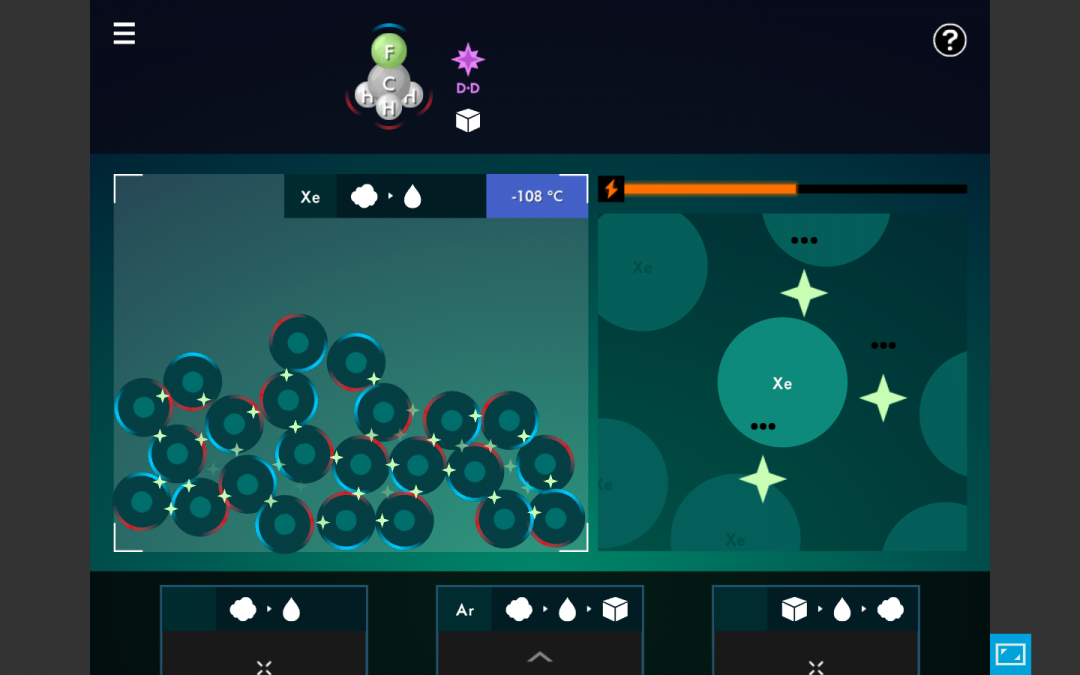
  • Illustrate the concept of temporary dipoles by placing Xe in the LDF level of the Sandbox.
  • Draw students’ attention to how the partial charges change as the electrons move around.
  • Explain permanent and temporary dipoles. Post these short TikTok videos for your students to watch!
@jbrownchem Permanent vs temporary dipole explained! #apchem #apchemistry #chemistry #chemistryhelp #apchemtips ♬ original sound – AP Chem Tips

@jbrownchem Dipole-dipole vs hydrogen bonding (not a bond.) #apchem #apchemistry #chemistry #chemistryhelp ♬ original sound – AP Chem Tips

  • Ask your students:
    • After playing Level 5, describe the three major types of intermolecular forces.
    • After playing Level 6, describe how IMFs affect noble gases.
  • Challenge your students to master the IMFs Sandbox Achievements:
    • Different types of IMFs
    • Polar/nonpolar molecules of different shapes
    • IMF relative strengths
    • Or, make up your own challenges and have students submit a screenshot of their work!

The IMF game shares Connected Levels with Atoms, Covalent Bonding, and Phase Change. Have your students complete both the IMFs game and EACH of the connected games, to open up the pipe between these games and CONNECT their learning!

Collisions Acids and Bases Game: Teaching Strategies to Use in Your Classroom

Collisions Acids and Bases Game: Teaching Strategies to Use in Your Classroom

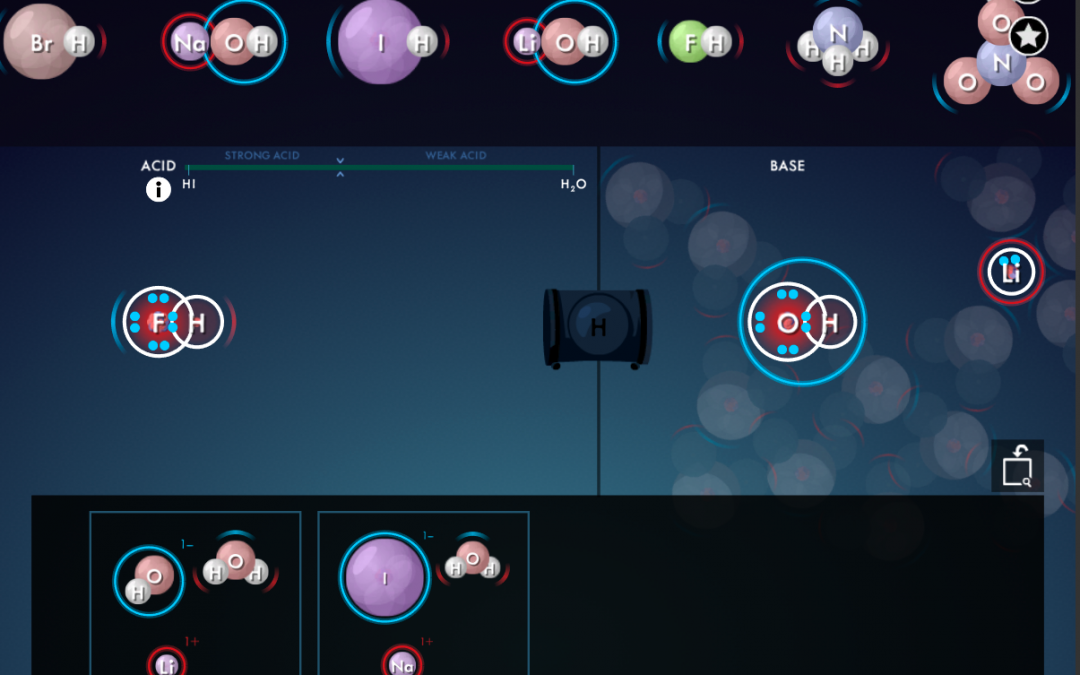
Have you been using the Collisions: Acids and Bases Game with your students? Below are some additional strategies to help with planning your lessons. Acids and Bases game in Collisions!

  • Before starting the game, ensure that students know the meaning of the following terms: acid, base, strong acid, weak acid, proton donor, proton acceptor.
    • As students play, introduce the terms conjugate acid, conjugate base, neutralization reaction.
  • Illustrate that acid strength increases as atomic radius increases. Use the halogens as an example.
  • Draw students’ attention to polyprotic acids – explain that each proton ionizes successively, and can protonate more than one substance.
  • Explain neutralization reactions – students are always amazed when they realize that combining a strong acid and a strong base results in an innocuous solution. Post these short TikTok videos for your students to watch!
@jbrownchem Why you’re struggling with acids and bases! #apchem #apchemistry #chemistryhelp #chemistry ♬ original sound – AP Chem Tips

@natalies.anatomy Strong acids& bases #fyp #chem #mcat #mcathelp #4u #acid #base #bio #chem #womeninstem #premed #premedlife #medschool #college #ochem #xyzbca ♬ Sunny Day – Ted Fresco

  • Ask your students:
    • After playing Level 3, describe a neutralization reaction. Why do you think it’s called “neutralization?”
    • After playing Level 5, describe what it means for a substance to be “amphoteric.”
  • Challenge your students to master the Acids & Bases Sandbox Achievements:
    • Add/Remove H+ from strong/weak acids and bases
    • Use an acid to create H2O
    • Use a base to create H2O
    • Ionize an acid stronger/weaker than certain acids
    • Use H2O as both an acid and a base
  • Or, make up your own challenges and have students submit a screenshot of their work!

The Acids & Bases game shares Connected Levels with Covalent Bonding. Have your students complete both the Acids & Bases game AND Covalent Bonding, to open up the pipe between these games and CONNECT their learning!
Collisions Equilibrium Game: Teaching Strategies to Use in Your Classroom

Collisions Equilibrium Game: Teaching Strategies to Use in Your Classroom

Have you been using the Collisions: Equilibrium Game with your students? Below are some additional strategies to help with planning your lessons.

  • Before starting the game, ensure that students know the meaning of the following terms: reactants, products, collisions, reaction rate
    • As students play, introduce the terms exothermic reaction, endothermic reaction, pressure, moles of gas
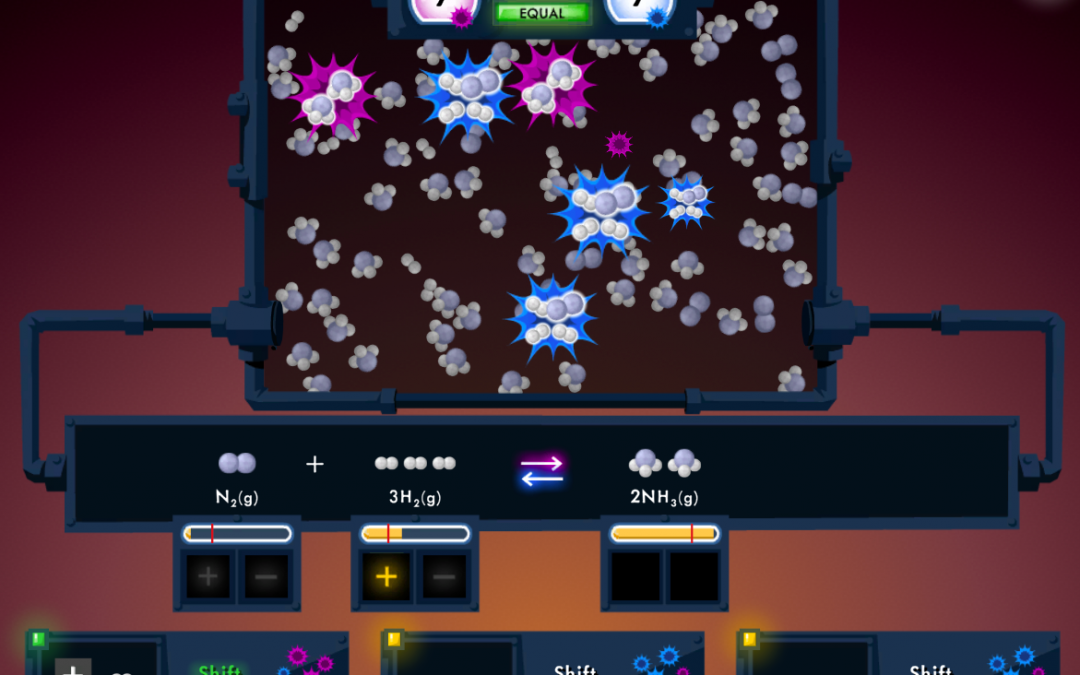
  • Illustrate a simulated chemical equilibrium by transferring colored water from one container to another (as seen in this video: https://youtu.be/EAu-j9gYmXs)
  • Draw students’ attention to the number of moles of gas on each side of a reaction, and explain how changes in pressure affect the reaction when disturbed.
  • Explain equilibrium and reversible chemical reactions. Post these short YouTube videos for your students to watch!

Ask your students:

  • After playing Level 9, describe how to increase the solubility of an ionic solid.
  • After playing Level 19, describe what happened to the pressure when you successfully decreased [O2]. Why did this happen?

Challenge your students to master the Equilibrium Sandbox Achievements:

  • Disturb concentrations/number of particles to affect a certain product
  • Disturb heat or pressure to affect a certain product
  • Shift the reaction in certain directions
  • Add or remove heat from a reaction to shift the reaction in certain directions
  • Disturb pressure with no shift in equilibrium
  • Or, make up your own challenges and have students submit a screenshot of their work!
Collisions Phase Change Game: Teaching Strategies to Use in Your Classroom

Collisions Phase Change Game: Teaching Strategies to Use in Your Classroom

Have you been using the Collisions: Phase Change Game with your students? Below are some additional strategies to help with planning your lessons.

  • Before starting the game, ensure that students know the meaning of the following terms: solid, liquid, gas, phase change, energy.
  • As students play, introduce the terms latent heat, intermolecular forces, exothermic process, endothermic process.
  • Illustrate that stronger intermolecular forces (denoted by the number of points on the “star”, as well as the number of clicks it takes to break them) have higher boiling points.
  • Draw students’ attention to the temperature DURING a phase change – available energy is used to break the intermolecular forces, but the temperature does NOT rise. This is called “latent heat.”
  • Explain how adding energy causes temperature rise or phase changes. Post these short YouTube videos for your students to watch!


Ask your students:

  • After playing Level 6, describe which types of phase changes are exothermic.
  • After playing Level 12, describe the relationship between IMFs and energy used.
  • Which IMFs require more energy to break or form?

Challenge your students to master the Phase Change Sandbox Achievements:

  • Six different types of phase changes
  • Lower/Higher boiling points than a certain compound
  • Exothermic vs endothermic phase changes
  • Latent heat
  • Or, make up your own challenges and have students submit a screenshot of their work!

The Phase Change game shares Connected Levels with IMFs and Ionic Bonding. Have your students complete both the Phase Change AND the IMFs (and/or) the Ionic Bonding game, to open up the pipe between these games and CONNECT their learning!
Collisions Covalent Bonding: Teaching Strategies to use in Your Classroom

Have you been using the Collisions: Covalent Bonding game with your students? Below are some additional strategies to help with planning your lessons.


Before starting the game, ensure that students know the meaning of the following terms: single bond, double bond, triple bond, valence electrons, lone pair (and/or non-bonded pair).

As students play, introduce the terms molecular shape, bond polarity electronegativity.


Illustrate the steps required to draw basic Lewis structures (outside of Collisions):

  • Count the number of valence electrons for all of the atoms.
  • Adjust for any ion charge, if needed.
  • Draw the skeleton structure for the molecule – the least electronegative element (but never H) goes in the center.
  • Connect the skeleton with single bonds. Knowing that every single bond contains 2 electrons, subtract the number of electrons used in the single bonds from the total number of valence electrons available.
  • Distribute remaining electrons, in pairs, to satisfy the octet rule, distributing to the outside atoms first, working inwards.
  • If available electrons are exhausted before the octet rule is satisfied for all atoms, share lone pairs of electrons with more central atoms to create double or triple bonds.

In the sandbox: draw students’ attention to SO₂ which contains a coordinate covalent bond. In order to create this structure in Collisions, one of the O atoms needs to have an empty domain to combine with a pair of electrons from the central S atom. Have students try to make ozone (O₃).


Explain VSEPR Theory to your students. Post these short videos for your students to watch!

After playing Level 11, ask your students to describe what is different about the bonds in each molecule they created. What influences the location of the shared electrons within a bond?

After playing Level 15, ask your students to explain the difference between the 3-dimensional shapes made by CH₂O and NH₃.


Have your students identify ionization energy trends, and draw the trends as big arrows across each period and down each group on a blank periodic table.


Challenge your students to master the Covalent Bonding Sandbox Achievements:

  • Molecule with single bond (Br₂)
  • Molecule with double bonds (CO₂)
  • Molecule with triple bond (C₂H₂)
  • Molecule with coordinate covalent bond (SO₂)
  • Single Bond, Double bond, Triple bond: nonpolar
  • Single Bond, Double bond: semipolar
  • Tetrahedral, trigonal planar, linear shaped molecules
  • Or, make up your own challenges and have students submit a screenshot of their work!

The Covalent Bonding game shares Connected Levels with Atoms, IMFs, and Acids & Bases. Have your students complete all levels of the Covalent Bonding game, as well as one of the other games listed, to open up the pipe between these games and CONNECT their learning!
Collisions Ions: Teaching Strategies to use in Your Classroom

Collisions Ions: Teaching Strategies to use in Your Classroom

Have you been using the Collisions: Ions game with your students? Below are some additional strategies to help with planning your lessons.


Before starting the game, ensure that students know the meaning of the following terms: atom, proton, electron, ion

As students play, introduce the terms valence electrons, cation, anion, octet rule


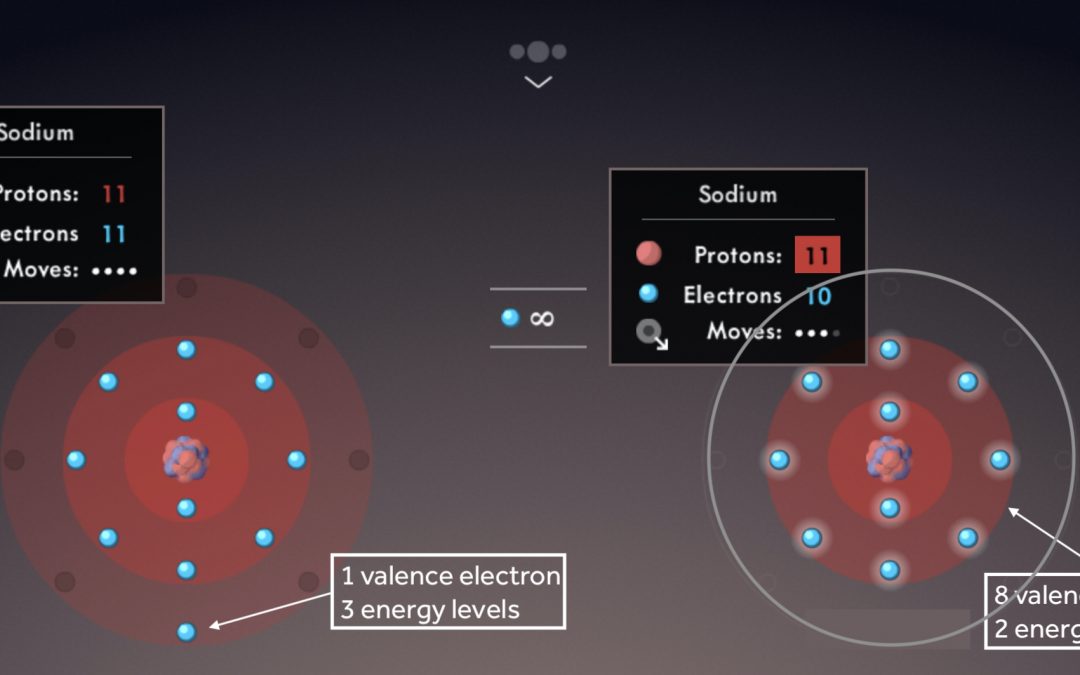
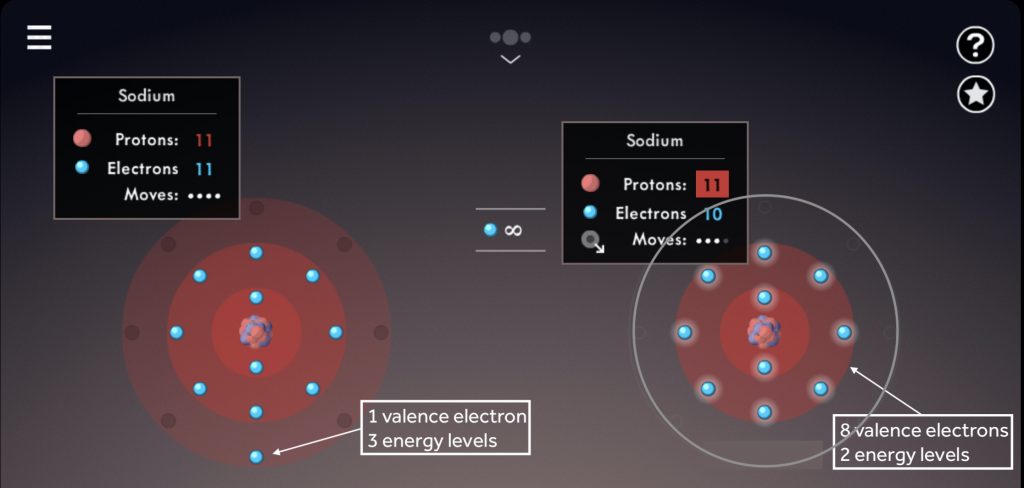
Illustrate the octet rule for cations by pointing out how the removal of one or more electrons uncovers a full shell underneath, which then becomes the valence shell.

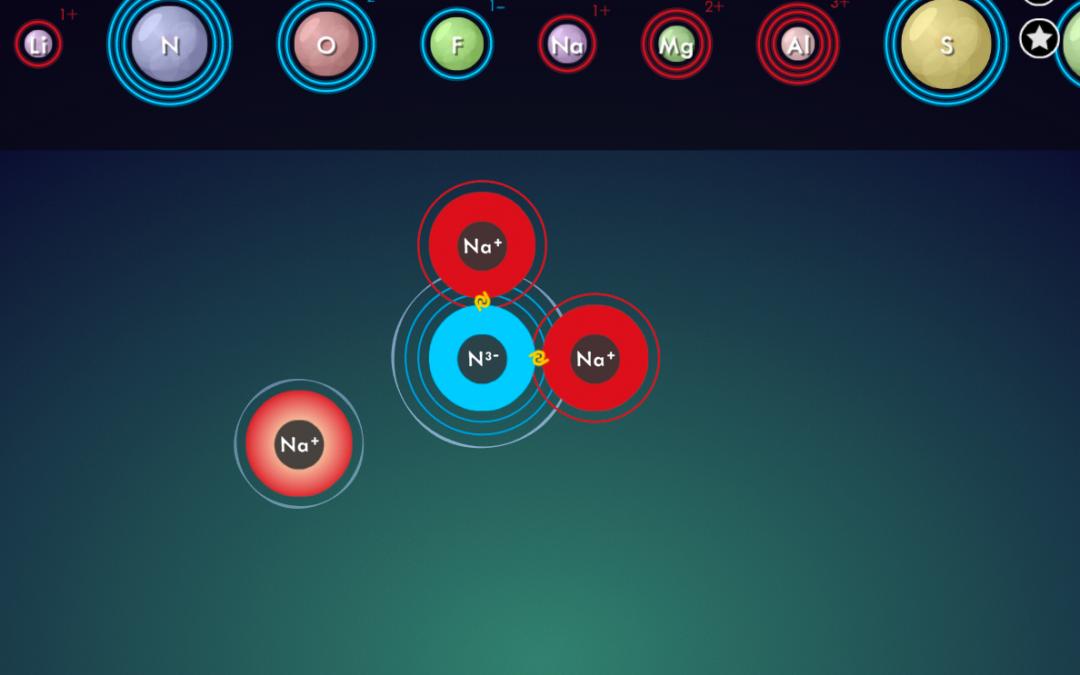
Note the number of valence electrons and energy levels within each sodium atom.


Draw students’ attention to the location of like-charged ions in the periodic table; ask students to predict ion charges based on element groups.


Explain the electrostatic force between protons and electrons that drives effective nuclear charge (Zeff), and how it affects the ionization energy. Post these short TikTok videos for your students to watch!

After playing Level 5, have your students describe the ionization energy trend that is represented down a group, and explain why this happens.

After playing Level 15, have your students describe the ionization energy trend that is represented across a period, and explain why this happens.


Have your students identify ionization energy trends, and draw the trends as big arrows across each period and down each group on a blank periodic table.


Challenge your students to master the Ions Sandbox Achievements:

  • Cation and anion formation
  • Specific ion charges
  • Ionization energy trends
  • Electron affinity trends
  • Ionic radii
  • Or, make up your own challenges and have students submit a screenshot of their work!

    The Ions game shares Connected Levels with Atoms and Ionic Bonding. Have your students complete both the Ions and Atoms games, or Ions and Ionic Bonding, to open up the pipe between these games and CONNECT their learning!
Collisions Atoms: Teaching Strategies to use in Your Classroom

Are you using the Atoms Game with your students? Below are some suggested teaching strategies to help you plan your lessons.


Explain the electrostatic force between protons and electrons that drives effective nuclear charge (Zeff), and how it affects the atomic radius. Post these short TikTok videos for your students to watch!

After playing Level 9, ask your students to describe the atomic radii trend that is represented down a group, and explain why this happens.

After playing Level 11, ask your students to describe the atomic radii trend that is represented across a period, and explain why this happens.


Have your students identify atomic radii trends, and draw the trends as big arrows across each period and down each group on a blank periodic table.


Challenge your students to master the Atoms Sandbox Achievements:

  • Atoms with certain numbers of protons
  • Atoms of increasing size between two noble gases (SUPER CHALLENGE for advanced students)
  • Atoms with low/medium/high electronegativity
  • Atoms with a certain number of valence electrons
  • Or, make up your own challenges and have students submit a screenshot of their work!

The Atoms game shares Connected Levels with Ions, IMFs, and Covalent Bonding. Have your students complete all levels of Atoms, and any one of the other three games to open up the pipe between these games and CONNECT their learning!
Collisions and Clever Classroom Integration Guide

Collisions and Clever Classroom Integration Guide

Collisions: Getting Started with Clever
Integrating Collisions with Clever offers you and your students the opportunity to sign into Collisions using the “Log In With Clever” button – no account setup or class codes needed!

Guide Overview
This guide offers an overview of:

  • How to sign up with Clever (or connect your existing Collisions account) through the Clever Library
  • How to create a new teacher account using Sign Up With Clever
  • How to import rosters using Clever
    • If you do not have classes set up within Collisions
    • If you do already have classes set up within Collisions (with or without students)
  • How to remove a student’s Clever connection

Click here to download full PDF guide